Looking for ways to expand your online business and increase your conversion rate? By integrating your Magento site with Amazon Pay, you allow the millions of Amazon customers the ease of logging in with their account and using their account information to purchase directly from your website. This added convenience can have a significant impact on conversion rate. See the case study at the bottom!
Setting up, integrating and testing Amazon Pay on your Magento 2 website can be easily accomplished in a just couple steps. We’ve made a quick guide for you here:
Step 1: Register with Amazon
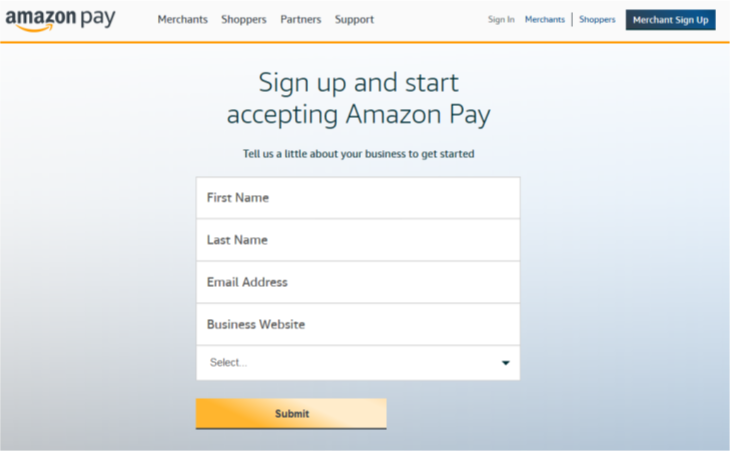
Go to https://pay.amazon.com/us/signup and fill in the details.
Upon submitting this information, you will be instructed to fill out a questionnaire to determine if you qualify for Amazon Pay. Then click to Sign Up Now. During this account registration, you will need to provide exact information because all it will need to be verified by Amazon Pay, and inaccurate information will only delay this process.
If you already have a Seller Central account use this to get started.
Step 2: Set up the sandbox account and retrieve your credentials
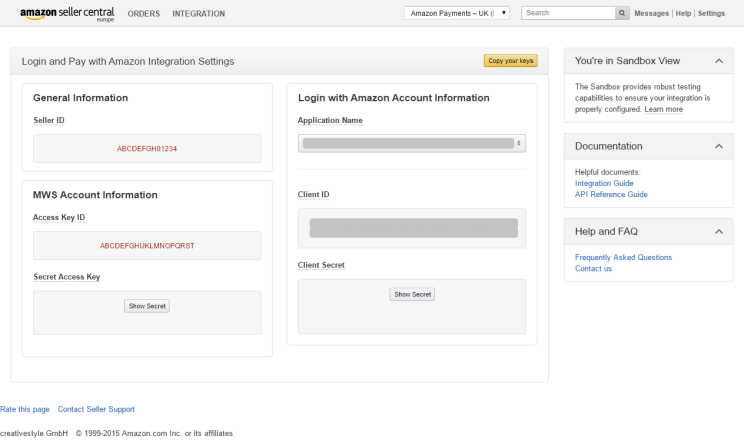
After you have registered your account, you will be directed to your Seller Central account. Log in to the account and switch to Amazon Payments (Sandbox View).
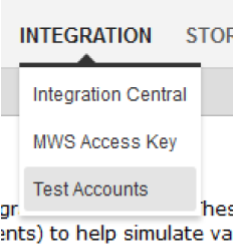
Once you are in Sandbox View, you will then need to retrieve your MWS Access Keys. At the top left corner of your Seller Central account, go to Integration > MWS Access Key. These are required to configure the Magento 2 extension.
Step 3: Integrate with Magento 2 site
Copy your keys and go to Magento Admin in Stores > Configuration > Sales > Payment Methods > Amazon Pay > General > Credentials and fill in the fields.
For more information, refer to the Integration Guide for a more detailed set of instructions.
Step 4: Create a test account
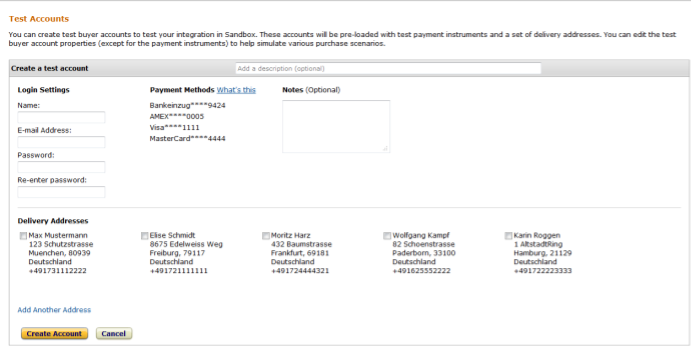
After completing the integration with your Magento site, you can test the integration in Sandbox mode. Create a test buyer account by logging back into your Seller Central Account and switching to Sandbox View, then go to Integration > Test Accounts.
There, you will Create a new test account and fill in the fields, and select a couple different addresses to use for testing.
Step 5: Test your integration
To test the integration, go to your site’s frontend and checkout with various scenarios:
- Checkout with existing account
- Checkout as guest
- Use promo code or gift cards
- Change billing or payment method
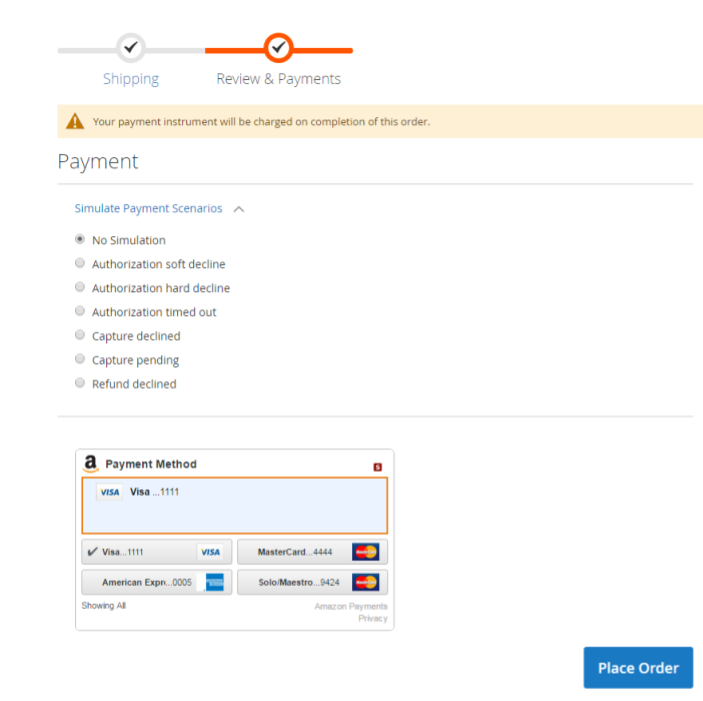
You can also simulate payment scenarios on the checkout page:
Step 6: Launch your updated site
When you have successfully tested the scenarios, you can proceed to launching your updated site by moving from Sandbox to Production mode. Make sure to review your live site to confirm that the live site is displaying the Amazon Pay button and widgets correctly. Additionally, place a couple orders on your live site to ensure that the payment method is working properly.
Amazon Pay Magento 2 Case Study:
Duke Cannon Case Study:
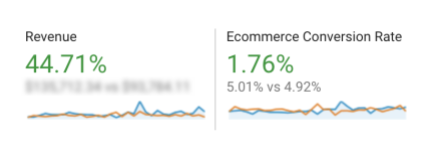
Adding Amazon Pay to the site this past year helped boost the conversion rate an additional 1% month over month. During November and December almost 40% of customers checked out using this payment method on the site.
Checkout with Amazon Comparison:
(Period: October 2017 vs. September 2017)
Need help with setting up Amazon Pay on your Magento 2 site?
At Cadence Labs, we’ve had years of experience developing Magento websites. If you need help, contact us for a free consultation or estimate on having us implement Amazon Pay on your website.


