
While dreaming up the new website for Cadence Labs I knew that I wanted to have an interactive (and fun!) splash page to greet our visitors. However, the last time I did any animation with a hover state I’d used a gif file. I’d seen a couple sites with excellent examples of animation, and what captivated me most was their responsive capability. These sites scaled, loaded and lost no quality as they transitioned to smaller retina screens. Intrigued, I did a little research and came across Adobe’s Edge Animate.
How to make an Interactive Homepage with Edge Animate
 1. Fire up Illustrator
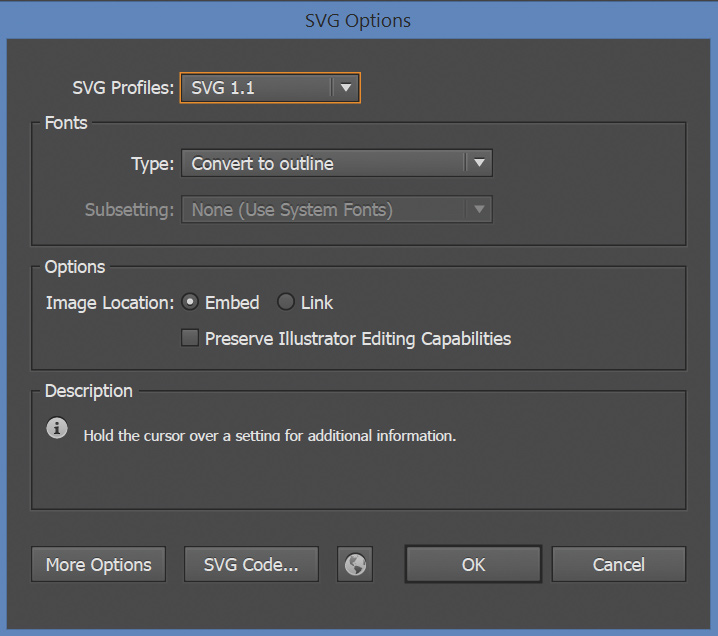
Your going to need SVGs, and a lot of them depending on the complexity of the animation. I recommend drafting a still version in Illustrator with all your components first. Unfortunately you can’t export your illustration to SVG, so you’ll need to go through the tedious process of saving them individually. For optimal results save each file with the art board sized to your vector and set your Save As settings like so. If you are using a custom font the “Covert to Outline” setting is required.
2. Open up Edge Animate
 If you’ve never used this product before watch a couple of the tutorials in Adobe’s lesson library. Now your ready to set up your stage. If your like me and you want to make a splash page then set your stage up with a standard size, a max width and make sure you use centering and the responsive scaling options. Checkout what I used to the left. These will make your life a lot easier down the line.
Now for the fun and tedious part of creating your animation.
I recommend starting with each part individually, then compiling these parts to create the full page. In my case I grouped each part that I wanted to have it’s own hover state together. You can do this by selecting all individual elements, right clicking and using “Convert to Symbol”. Double click on that symbol and you’ll enter it’s specific timeline.
From here you can follow a lot of the basic demos to create the animated effects you want.
3. Play on hover or mouse over.
I’ve seen a couple different ways to do this, but to me this seems to be the easiest. Here’s how to make a hover state that will play you symbols individually as you scroll over them.
4. Publish & Upload
The last part can be fairly website dependent, but in general here is how to export your animation for the web. Go into File -> Publish Settings. Set your Publish Target to Web. I recommend also turning off the “Host runtime files on Adobe CDN”. Everything else can be left as is or changed to your personal preferences. Then just click Publish.
Now you just need to upload your files to your website’s server. You can include your HTML file wherever you would like or copy the necessary scripts and the <div> tag to include them as part of an already existing page.